Universal Joints, often called cardan joints, are a means of transferring rotational energy from one variable axis to another and are used all over the place. They're basically a pair of hinges and you'll these on drive shafts everywhere where you'll need to compensate for movement.
Tech Art and Stuff
A eclectic mix of tools, techniques, and brain farts in the games industy..
21.8.13
How To : Rig a Universal Joint in Maya
Universal Joints, often called cardan joints, are a means of transferring rotational energy from one variable axis to another and are used all over the place. They're basically a pair of hinges and you'll these on drive shafts everywhere where you'll need to compensate for movement.
7.8.13
How to : Create Expressions Without the Expression Editor in Maya
There's a really quick way of getting a simple expression on a channel in Maya.
In the attribute editor, just type in your expression starting with a ' = ' in the field you wish to modify.
For example, when I'm designing cranks or cams, I often just want something rotating at a constant rate and don't want the faff of keyframing. So I'll select the object I want rotating, and enter ' =frame * 10 'in the field for the Z rotation in the attribute editor.
Now when I scrub the timeline, it will always rotate. Btw, frame is a pre-defined variable and refers to the current frame and the * 10 is a multiplier, so I know that on frame 36 I've rotated by 360 degrees.
There's plenty of scope for this, you can use it for connecting channels or I've even used it to lock channels, just put =0 on the rx,ry and rz channels of an object to stop it's rotation, though that's probably taking it a little too far.
25.7.13
Python - How to Import a Module Outside of sys.path
For those times when appending to sys.path is out of the question, the imp module exposes functions from Python's import module.
import imp
myModule = imp.load_source("myModule", "a:\path\that\is\not\in\the\syspath\myFile.py")
In my case, I was using it in a destination module to control a tool distribution system, and I didn't want to import both source and destination mirrored modules but still wanted to access one particular file.
15.7.13
8.7.13
How To : Create A Realistic Car Steering Rig in Maya
Turning a car is not as simple as you think. There's some quite advanced geometry at work to order to maintain the correct rotations for each front wheel in order to keep the turn 'on track'. The radii for each wheel change at a non-linear rate as the turn gets sharper.
A best practical solution is the Ackerman Steering Principle, a well documented system. Whilst not 100% perfect, it's pretty much near to and as it's used on most vehicles today, this is what we'll use as our template. No bodging here I'm afraid. For more reading and theory that I will explain here, there's an excellent Wiki page on this Ackerman Steering Geometry.
6.6.13
How To : Rig Accurate Working Springs in Maya
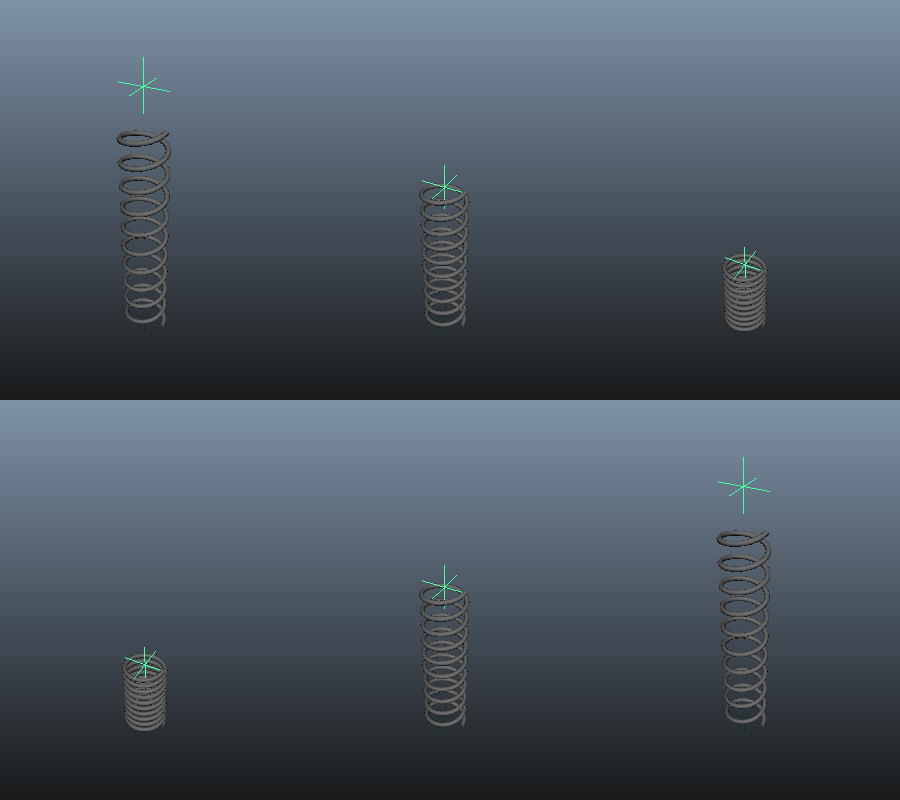
 I've seen a few piston or damper rigs, and each one works well until a spring is added. All too often they use a scale system that kind of works ok for a casual inspection, but under close scrutiny falls apart because the scaling produces a noticeable flattening of the spring's cross section under extreme compression.
Here I'll discuss two other ways of achieving this effect with near complete accuracy, and along the way we'll create a couple of rigs in order to demonstrate these techniques.
This gif on the right is what we're aiming for, a self contained rig that can be used almost anywhere, and will not exceed it's limits. The first method I'll discuss involves Maya's blendshapes.
13.5.13
8.5.13
How To : Create Hoeken's Linkages in Maya
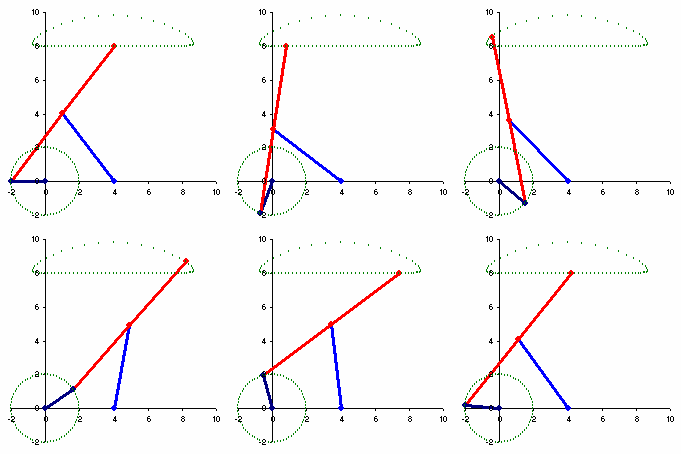
Hoeken's Linkage is quite a special thing, really, it is. It sounds stuffy and technical and yes it is, but trust me it's also quite amusing. No doubt you've seen it before and is remarkably simple.
This linkage is a special case of a four bar linkage system where it converts rotational motion into constant linear motion in such a way as to produce an approximate stepping motion. This motion could be used to provide the mechanism for a walk, a conveyor belt, or other types of modified stepped motion.

This linkage is a special case of a four bar linkage system where it converts rotational motion into constant linear motion in such a way as to produce an approximate stepping motion. This motion could be used to provide the mechanism for a walk, a conveyor belt, or other types of modified stepped motion.

1.5.13
Python - Live Housekeeping in Maya.
Sometimes, there's a need to make sure things aren't saved with the scene. Things like helper geometry or specific 3rd Party plugin dependency nodes, or even maya locator or lights. And sometimes you may just want to have a bit of a clear out.
Expressions for example. I wonder if you've also come across the 80mb+ file that had nothing but simple geometry yet filled to the brim with legacy debris in the DAG from 3rd party tools that had no right to be in your pipeline. In this case, a tool one of the team used generated expressions to provide an interactive UX for splitting polys. For one reason or another it failed to cleanup after itself. Added to the fact that an artist's or animator's workflow can often propogate these tpyes of nodes by means of 'dirty' imports, it can lead to rubbish in the scenes than at the very least increases the storage footprint and load / save times, at the worst it could compromise the scene's export integrity. Expressions are one example of this 80mb 'infection'.
So we needed a way to clean the scene, but not rely on the users to action this clean up. We decided that running the cleanup script when the user saves is probably a good time to do this.
So rather than a scriptJob (iirc this doesn't catch save events), I'm using the API and OpenMaya.MSceneMessage. The kBeforeSave enumerator is used to register a callback to a function that does the cleaning up, onSave in this case.
This will execture everytime the user saves. It's unobtrusive and simple.
To remove it, use the following..
This worked well to clean assets whilst the underlying issues were dealt with, but I've often thought this could be used for other live housekeeping duties. We nearly always validate for game assets exports, rarely for maya saves.
And if you had an evil streak, you could have a lot of fun with this.
Expressions for example. I wonder if you've also come across the 80mb+ file that had nothing but simple geometry yet filled to the brim with legacy debris in the DAG from 3rd party tools that had no right to be in your pipeline. In this case, a tool one of the team used generated expressions to provide an interactive UX for splitting polys. For one reason or another it failed to cleanup after itself. Added to the fact that an artist's or animator's workflow can often propogate these tpyes of nodes by means of 'dirty' imports, it can lead to rubbish in the scenes than at the very least increases the storage footprint and load / save times, at the worst it could compromise the scene's export integrity. Expressions are one example of this 80mb 'infection'.
So we needed a way to clean the scene, but not rely on the users to action this clean up. We decided that running the cleanup script when the user saves is probably a good time to do this.
So rather than a scriptJob (iirc this doesn't catch save events), I'm using the API and OpenMaya.MSceneMessage. The kBeforeSave enumerator is used to register a callback to a function that does the cleaning up, onSave in this case.
import maya.cmds as mc
import maya.OpenMaya as om

def onSave(*args):
 mc.delete(mc.ls(type="expression"))

callbackID = om.MSceneMessage.addCallback(om.MSceneMessage.kBeforeSave,onSave)
This will execture everytime the user saves. It's unobtrusive and simple.
To remove it, use the following..
def callBackOff():
 om.MMessage.removeCallback(callbackID)
This worked well to clean assets whilst the underlying issues were dealt with, but I've often thought this could be used for other live housekeeping duties. We nearly always validate for game assets exports, rarely for maya saves.
And if you had an evil streak, you could have a lot of fun with this.
17.4.13
28.2.12
Maya : Using Operators to flip Anim Curves in the Graph Editor
One neat trick in Maya is the ability to use MEL operators as a shorthand way to manipulate transforms, rotates and scales.
Valid operator are: += to add, -= to subtract, *= to multiply and /= to divide.
Say you wanted to move a selection of objects all up by a set amount. You could use the 'relative transform' box on the status line, if you don't use a snap that is. However, if you entered '+=5' in the translateY channel box of the selected meshes then you'd move everything selected up by 5 in the Y.
Where this is really neat is that this trick also works in the Graph Editor. You can offset curves by a fixed amount. You can scale -1 and flip curves and key frames, all by entering a operator in the value side of the stats box. Chris Lesage added that by typing a percentage in, then the existing value will be calculated to the new value. To use Chris's example, if you have '2' and you type '110%' then you get '2.2'.
3.2.12
4.1.12
Python - Find Items in a List that are also a String
I don't really use the filter command much, until I needed to see whether something in a string was also in a list..
myList = ['fart', 'boff', 'squit','trump']
myString = "I really couldn't help but trump and fart all night"
print filter(lambda x : x in myString, myList)
>>>['fart', 'trump']
20.12.11
5.12.11
Maya Utility Node Listing Help
I find I'm using more utility nodes these days, and most of the time these are created from scripts. Nodes like 'distanceBetween', 'multiplyDivide' and 'clamp' nodes provide the various gubbins for rigging functions and enhancements. Up till now, I just created them and would search for them by graphing a connected node, or looking for them in the outliner. These nodes always required a little bit of effort to find them.
So now when I create them, I create them as 'utility' nodes by saying so in the syntax of the creation command. Btw, this mimics how they're created by default in the hypershade.
import maya.cmds as mc

mc.shadingNode('clamp', asUtility=True, name='myClamp')
Now I can easily access all these nodes under the 'Utility' tab in the hypershade. I love it more when it's easier.
9.11.11
How To : Animate Cranks and Pistons in Maya
 |
| figure 1 |
A recent project I worked on required the modelling of an animating crank and a piston similar to those used by steam locomotives. Engines that use pistons as a power source need a way of converting the back and forth (reciprocating) linear piston motion into rotational motion. Cranks are used to do this and these are connected to points that are offset from the main rotational axis on what is called the crankshaft, and these in turn are connected to the pistons. The crankshaft is the part that receives the rotational energy. The system will also work in reverse, turning the rotational movement into linear.
So that's how it works in the real world, so how do we translate this into Maya?
27.9.11
31.8.11
Python - Removing Duplicate Values from a Dictionary
So I had this Maya script that created loads of identical meshes, often in duplicate positions and I needed a clean up script to identify those meshes that were coincident. I could have iterated over a list of objects and compared their positions and filtered them accordingly, however, I thought the immutable nature of a python dictionary could be used instead.
Here I'm using a tuple (made from the object's XYZ position) as a key, and the object's name as a value. The dictionary doesn't permit duplicate keys, so we filter out all duplicate objects. The dictionary is then returned as a list of values (object names). Simple.
Here I'm using a tuple (made from the object's XYZ position) as a key, and the object's name as a value. The dictionary doesn't permit duplicate keys, so we filter out all duplicate objects. The dictionary is then returned as a list of values (object names). Simple.
import maya.cmds as mc

def getUniqueObjects(selection):

	d = {}

	for mesh in selection:

		pos = tuple(mc.xform(mesh, query=True, translation=True))
		d[pos] = mesh

	return d.values()
15.6.11
Subscribe to:
Posts (Atom)


