 I've seen a few piston or damper rigs, and each one works well until a spring is added. All too often they use a scale system that kind of works ok for a casual inspection, but under close scrutiny falls apart because the scaling produces a noticeable flattening of the spring's cross section under extreme compression.
Here I'll discuss two other ways of achieving this effect with near complete accuracy, and along the way we'll create a couple of rigs in order to demonstrate these techniques.
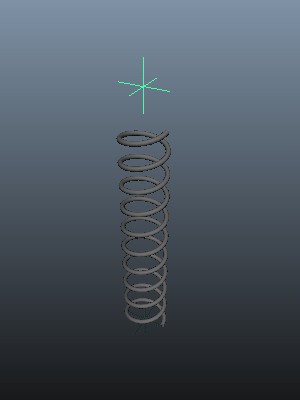
This gif on the right is what we're aiming for, a self contained rig that can be used almost anywhere, and will not exceed it's limits. The first method I'll discuss involves Maya's blendshapes.
Method #1 Using Deformers
This is probably the most common of the two methods as it uses a fairly well known deformer, Maya's blendshape deformer. We'll use it to morph between two meshes and control the blend of this morph with the value of difference in height of these two meshes. We'll do this by creating two topographically identical springs, one where the coils are fully compressed and the other where it's fully extended. Then we'll create a blendshape from these meshes and lastly, and probably the most difficult part, is to create a node network that will work together with contraints and rig controls to adjust the extension and compression of this spring.
So we'll need two springs, named compressed and uncompressed and created using the polygon Helix command. It's critical that we need to know the heights of both springs, as we'll need that later when we construct a node network. Create two helixes with the following values, one with height=2 and one with height=10. Name them compressed and uncompressed respectively.

import maya.cmds as mc

springCompressed = mc.polyHelix(c=10,h=2,w=2,r=0.1,sa=24,sco=24,sc=0,d=1,ax=(0,1,0),rcp=0,cuv=3,ch=0)
springUncompressed = mc.polyHelix(c=10,h=10,w=2,r=0.1,sa=24,sco=24,sc=0,d=1,ax=(0,1,0),rcp=0,cuv=3,ch=0)

mc.xform(springCompressed, pivots = (0,-1,0), p=True)
mc.xform(springUncompressed, pivots = (0,-5,0), p=True)

mc.move(0,1,0,springCompressed,relative=True, worldSpaceDistance=True,objectSpace=True)
mc.move(0,5,0,springUncompressed,relative=True, worldSpaceDistance=True,objectSpace=True)
Next we need to create the blendshape, and we might as well delete the unneeded spring (we've got the deformation values from it in the blendshape node, so we don't really need this anymore).
Select the compressed spring, then the uncompressed spring then run the Blendshape command from the Create Deformers menu. Make sure to name this node springBlend.

Or enter the following code..
mc.blendShape(springUncompressed,springCompressed,origin='world', name='springBlend')
mc.delete(springUncompressed)
If you select the 'springBlend' node, and look in the Channel Box you'll see a channel that controls the blend and called 'uncompressed'. If you change the value (0 < value < 1) of this hopefully the spring will now compress or extend.
We now need to find a way to control this blend value in a useful way. We know that the range of this blend value is from 0 (compressed) to 1 (uncompressed), and we know that the heights of the springs are 2 (compressed) and 10 (uncompressed). If we map these differences in height to the value of the blend, we would get a direct relationship of the physical mesh size to the blend between them. Fortunately, Maya has a utility node that will do just this, the 'setRange' node. This will take a value and a range and calculate a new value based on a different range.
So first we need a value to map into this node. This will be the distance we need the spring to represent and we'll use two locators, lower_LOC and upper_LOC, and we'll position them at the lower and upper positions of the spring.
locLower = mc.spaceLocator(name='lower_LOC')[0]
locUpper = mc.spaceLocator(name='upper_LOC')[0]
mc.move(0,2,locUpper,absolute=True, worldSpaceDistance=True,objectSpace=True)
To make the rig more dynamic and useful, we'll also point constrain the spring to the lower_LOC, and aim constrain the spring to the upper_LOC.
mc.pointConstraint(locLower,springCompressed)
mc.aimConstraint(locUpper,springCompressed,aimVector=(0,1,0))
To get the distance for our value, we'll sample the distance between these two locators by creating a distanceBetween node, and connect the two locator's worldMatrix attributes to the input matrix channels of this distanceBetween node. The output value of the distanceBetween node will be later connected to the setRange node.

distanceNode = mc.createNode('distanceBetween')
mc.connectAttr('{0}.worldMatrix[0]'.format(locUpper),'{0}.inMatrix1'.format(distanceNode),  force=True)
mc.connectAttr('{0}.worldMatrix[0]'.format(locLower), '{0}.inMatrix2'.format(distanceNode), force=True)
And now for the final part. We need something to take this distances, and map it into a value between ) and 1 so we can use it to drive the blend value between the two states of the spring.
We'll create a setRange node, connect the distanceBetween node's output value to it, and then to complete the rig we'll connect the output of the setRange node to the blend value. As the distance is a scalar, we're using just the X value attributes of the setRange node for this set up.
setRangeNode = mc.createNode('setRange')

mc.connectAttr('{0}.distance'.format(distanceNode),'{0}.valueX'.format(setRangeNode),  force=True)
mc.connectAttr('{0}.outValueX'.format(setRangeNode),'{0}.{1}'.format(blendNode,springUncompressed),  force=True)

The last step is to set the min and max attributes to reflect the relationship of the spring's height to the associated value of the blend.
minX and maxX relate to the blend value (0 and 1)
oldMinX and oldMaxX are the height of the compressed and uncompressed spring (2 and 10)

mc.setAttr('{0}.minX'.format(setRangeNode),0)
mc.setAttr('{0}.maxX'.format(setRangeNode),1)
mc.setAttr('{0}.oldMinX'.format(setRangeNode),2)
mc.setAttr('{0}.oldMaxX'.format(setRangeNode),10)
If you just want to see it in action, here's the full script. Cut and paste it into Maya's scripts editor window and move the locators about to see it work.
import maya.cmds as mc

springCompressed = mc.polyHelix(c=10,h=2,w=2,r=0.1,sa=24,sco=24,sc=0,d=1,ax=(0,1,0),rcp=0,cuv=3,ch=0, name='compressed')[0]
springUncompressed = mc.polyHelix(c=10,h=10,w=2,r=0.1,sa=24,sco=24,sc=0,d=1,ax=(0,1,0),rcp=0,cuv=3,ch=0, name='uncompressed')[0]

mc.xform(springCompressed, pivots = (0,-1,0), p=True)
mc.xform(springUncompressed, pivots = (0,-5,0), p=True)

mc.move(0,1,0,springCompressed,relative=True, worldSpaceDistance=True,objectSpace=True)
mc.move(0,5,0,springUncompressed,relative=True, worldSpaceDistance=True,objectSpace=True)

blendNode = mc.blendShape(springUncompressed,springCompressed,origin='world', name='springBlend')[0]
mc.delete(springUncompressed)

locLower = mc.spaceLocator(name='lower_LOC')[0]
locUpper = mc.spaceLocator(name='upper_LOC')[0]
mc.move(0,2,locUpper,absolute=True, worldSpaceDistance=True,objectSpace=True)

mc.pointConstraint(locLower,springCompressed)
mc.aimConstraint(locUpper,springCompressed,aimVector=(0,1,0))

distanceNode = mc.createNode('distanceBetween')
mc.connectAttr('{0}.worldMatrix[0]'.format(locUpper),'{0}.inMatrix1'.format(distanceNode),  force=True)
mc.connectAttr('{0}.worldMatrix[0]'.format(locLower), '{0}.inMatrix2'.format(distanceNode), force=True)

setRangeNode = mc.createNode('setRange')

mc.connectAttr('{0}.distance'.format(distanceNode),'{0}.valueX'.format(setRangeNode),  force=True)
mc.connectAttr('{0}.outValueX'.format(setRangeNode),'{0}.{1}'.format(blendNode,springUncompressed),  force=True)

mc.setAttr('{0}.minX'.format(setRangeNode),0)
mc.setAttr('{0}.maxX'.format(setRangeNode),1)
mc.setAttr('{0}.oldMinX'.format(setRangeNode),2)
mc.setAttr('{0}.oldMaxX'.format(setRangeNode),10)
Method #2 Using Construction History
This method exploits Maya's construction history, in particular the polyHelix node that we use to construct the spring. In this case we'll only need one mesh rather than the two that we used in the deformation technique above. We'll essentially build the same network, only this time it's much simpler as we only need to connect the distanceBetween node to the correct input of the polyHelix node. We'll not be needing the setRange node in this rig.
This time we'll only need one spring, compressed, but this time we won't relocate it's origin.
import maya.cmds as mc

springCompressed = mc.polyHelix(c=10,h=2,w=2,r=0.1,sa=24,sco=24,sc=0,d=1,ax=(0,1,0),rcp=0,cuv=3,ch=1, name='compressed')
Note, now we've turned history on, we need the original return from the polyHelix command, so springCompressed is a now a list. This is because the polyHelix command returns it's contruction node at index 1 which we'll need access to in a bit. It also uses an integral centred pivot point, which is why we don't relocate it but work with it.
We'll create the distance node and the locators with their constraints exactly as before.
locLower = mc.spaceLocator(name='locLower')[0]
locUpper = mc.spaceLocator(name='locUpper')[0]
mc.move(0,2,locUpper,absolute=True, worldSpaceDistance=True,objectSpace=True)

mc.pointConstraint(locLower, locUpper,springCompressed[0])
mc.aimConstraint(locUpper,springCompressed[0],aimVector=(0,1,0))

distanceNode = mc.createNode('distanceBetween')
mc.connectAttr('{0}.worldMatrix[0]'.format(locUpper),'{0}.inMatrix1'.format(distanceNode),  force=True)
mc.connectAttr('{0}.worldMatrix[0]'.format(locLower), '{0}.inMatrix2'.format(distanceNode), force=True)
Here's the last step; we connect the distance value to the height input of the polyHelix node.
mc.connectAttr('{0}.distance'.format(distanceNode),'{0}.height'.format(springCompressed[1]), force=True)
That's it. All done.
If you move the locators about, it'll operate the same as the blendshape method only there's no limits imposed on the system. You could argue that's a bad thing and I'm sure we could use another setRange or a clamp node to limit this behaviour but using construction history is a very real option here, especially during the visual design stage.
See what happens when you change other values on the polyHelix node, number of coils, radius or direction. The rig will still work provided you maintain this history.
Try it.
import maya.cmds as mc

springCompressed = mc.polyHelix(c=10,h=2,w=2,r=0.1,sa=24,sco=24,sc=0,d=1,ax=(0,1,0),rcp=0,cuv=3,ch=1, name='compressed')

locLower = mc.spaceLocator(name='locLower')[0]
locUpper = mc.spaceLocator(name='locUpper')[0]
mc.move(0,2,locUpper,absolute=True, worldSpaceDistance=True,objectSpace=True)

mc.pointConstraint(locLower, locUpper,springCompressed[0])
mc.aimConstraint(locUpper,springCompressed[0],aimVector=(0,1,0))

distanceNode = mc.createNode('distanceBetween')
mc.connectAttr('{0}.worldMatrix[0]'.format(locUpper),'{0}.inMatrix1'.format(distanceNode),  force=True)
mc.connectAttr('{0}.worldMatrix[0]'.format(locLower), '{0}.inMatrix2'.format(distanceNode), force=True)

mc.connectAttr('{0}.distance'.format(distanceNode),'{0}.height'.format(springCompressed[1]),  force=True)
Conclusion
Both do the job admirably. The deformer method requires slightly more techincal skill and is less flexible. However, most game engines support morph targets so it's the only real choice if that's your platform.
However, the construction history method has a lot going for it, it's simpler, more elegant, easily remembered and mostly of all it let's you experiment and alter the mesh in situ. For r&d it's great, not only for springs but other mechanically driven rigs.
Have fun.
This is so Dificult method....plz use simple method......specialy not use expression
ReplyDeleteHi. There is no expressions here, it's all node based. I'm just using maya.cmds in a python script window to author and setup the networks as a way of showing how I set this up to get an accurate representation. If you read the text you should be able to see the steps involved.
DeleteYou can always paste the code into a python tab in the script window, essentially getting the exact example in my illustrations. Failing that, the simple method I mention at the start is to just use scale.
Hi Paul, thank you for great tutorial, i was doing it with a spring script from creative crash (which has a length attribute). But my question is, how do you think one can achive a dynamic spring in maya? (there is one tutorial for C4D here: https://vimeo.com/58964492 )
ReplyDeleteHi Sergen, Maya has spring constraints.
DeleteIt should be simple enough to create a conceptual 'spring' from two mesh planes placed at the top and bottom of the mesh spring, then assign a dynamic spring constraint to these. You would then create a distanceBetween node between these and connect the output distance to the height input of the helix node as before.
Any outside dynamic influence should be rigged by attaching other dynamic constraints to this spring, such as pin constraints.
I may revisit this tutorial with this in mind, thanks for the input Sergen.
Very fun tut, good stuff! Another method to try is to use an edge from the helix you create, one that runs along the whole spring. Convert that edge to a curve. Delete all the construction history. Apply the curve as a wire tool to the mesh. Crank up the falloff on the wire (you can test later how much). Now, create a single joint at the base of the spring. Skin the curve to the joint. Now, whenever you will scale the joint in it's up direction, your spring will act just like it should!
ReplyDeleteHave a go, and let me know what you think (unless you already have tried this, in which case, sorry for double post :) )
Hi Dimitry, thanks for the comment. I really like your solution, though getting the weighting to work properly was a bit tricky for me.
DeleteHaving said that, using the wire deformer and connecting the scale of the curve to the distance between the two end points works very well, probably better than than my construction history method. Any distortion is negligible and I think I'll use this in future. Thanks again for your post, much appreciated.
Paul
Awesome, glad to hear you found it useful!
DeleteHi,Dimitry,i want to put the spring into a human-rig as a part,like a spring-man. I did as what you said, but when i change the highest control , the spring modle will been thin and run away.This trouble me .Can you help me ?
DeleteNice Post. Thanks for Sharing
ReplyDeleteAutomobile Part Manufacturers
Automobile Spare Part Manufacturers
Car Suspension Manufacturers
Filter Manufacturers
Brake Manufacturers